 StardewValleyZone
If you’ve ever spent a whole in-game morning watering parsnips while your energy bar vanishes, you’ll understand why I became obsessed with sprinklers. By 2026, Stardew Valley might be a decade old, but the satisfaction of waking up to fully hydrated crops never fades. I’ve restarted my farm more times than I’d like to admit, and each journey taught me something new about squeezing every drop of value from those clunky, water-spitting devices. My current save sits in Year 7, with a layout so efficient I barely lift a watering can except for the first week of spring. Here’s how I went from drowning in chores to automating paradise.
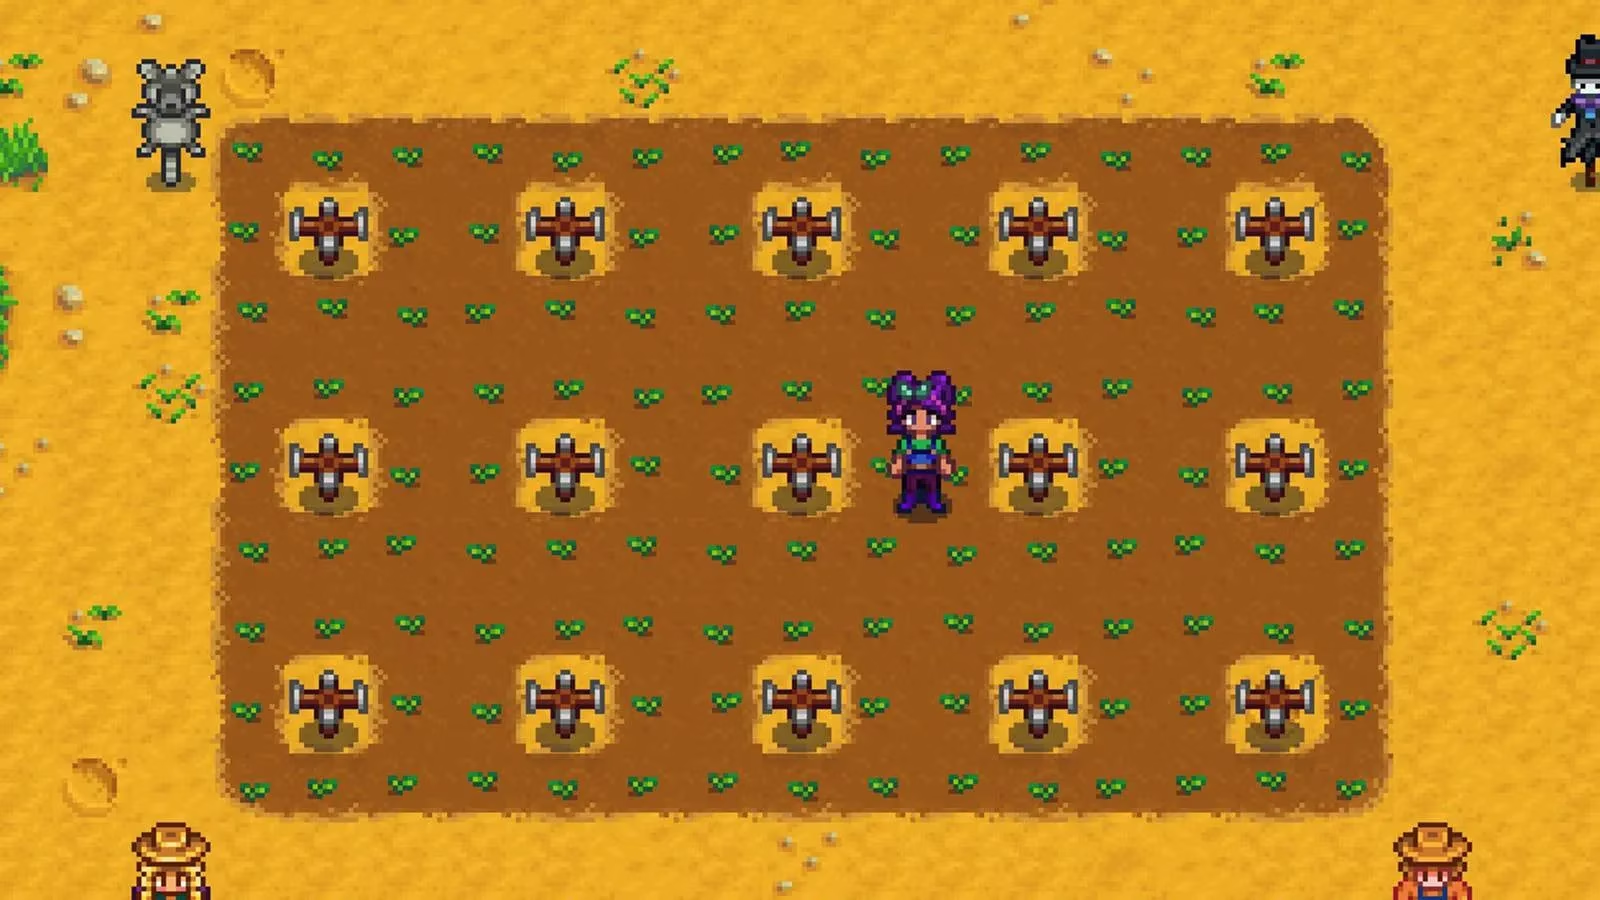
Early on, I didn’t realize there were three distinct sprinklers waiting behind skill unlocks and mining trips. The first time I crafted a basic Sprinkler, I felt like a genius—until I saw its pathetic coverage: just four tiles. Desperation breeds creativity, and after a few wasted seasons, I stumbled onto a diagonal layout that completely changed the early game. Instead of placing Normal Sprinklers side by side like some kind of symmetrical monster, I arranged them in staggered rows, each one watering the four spots its neighbor missed. The pattern resembles a checkerboard where the sprinklers sit on the black squares.
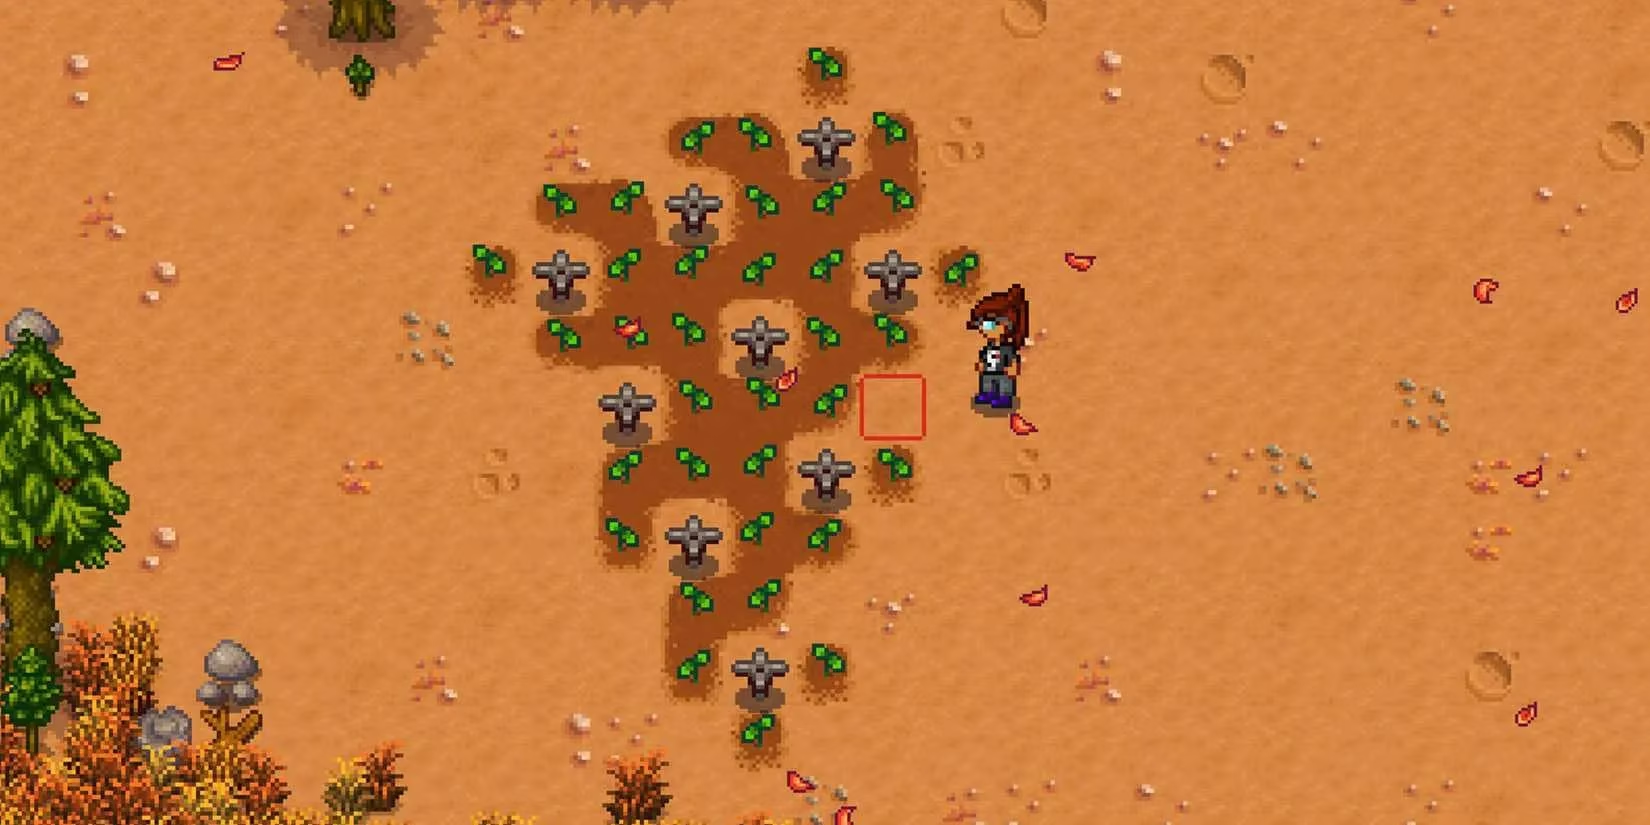
That diagonal trick freed up so much time I finally explored the mines properly. Scarecrow placement felt natural with this setup too—I simply dropped them into the empty tiles along the edges, and their eight-directional aura covered everything. Ravens never stood a chance. I remember one rainy fall evening when I realized my little crooked field was actually outperforming my neighbor’s meticulously straight rows. Sometimes imperfection is the real optimization.
After many furnace sessions and a few frustrated trips to floor 80, I upgraded to Quality Sprinklers. These glorious machines cover eight adjacent tiles—exactly the 3×3 square minus the center. My instinct said “pack them tight,” but that led to duplicate watering zones and wasted potential. The optimal layout placed them with a one-tile gap between every sprinkler, forming neat blocks of watered ground with unwatered paths. Imagine a grid where each sprinkler acts like a knight in chess, but simpler: just keep one tile of separation horizontally and vertically.
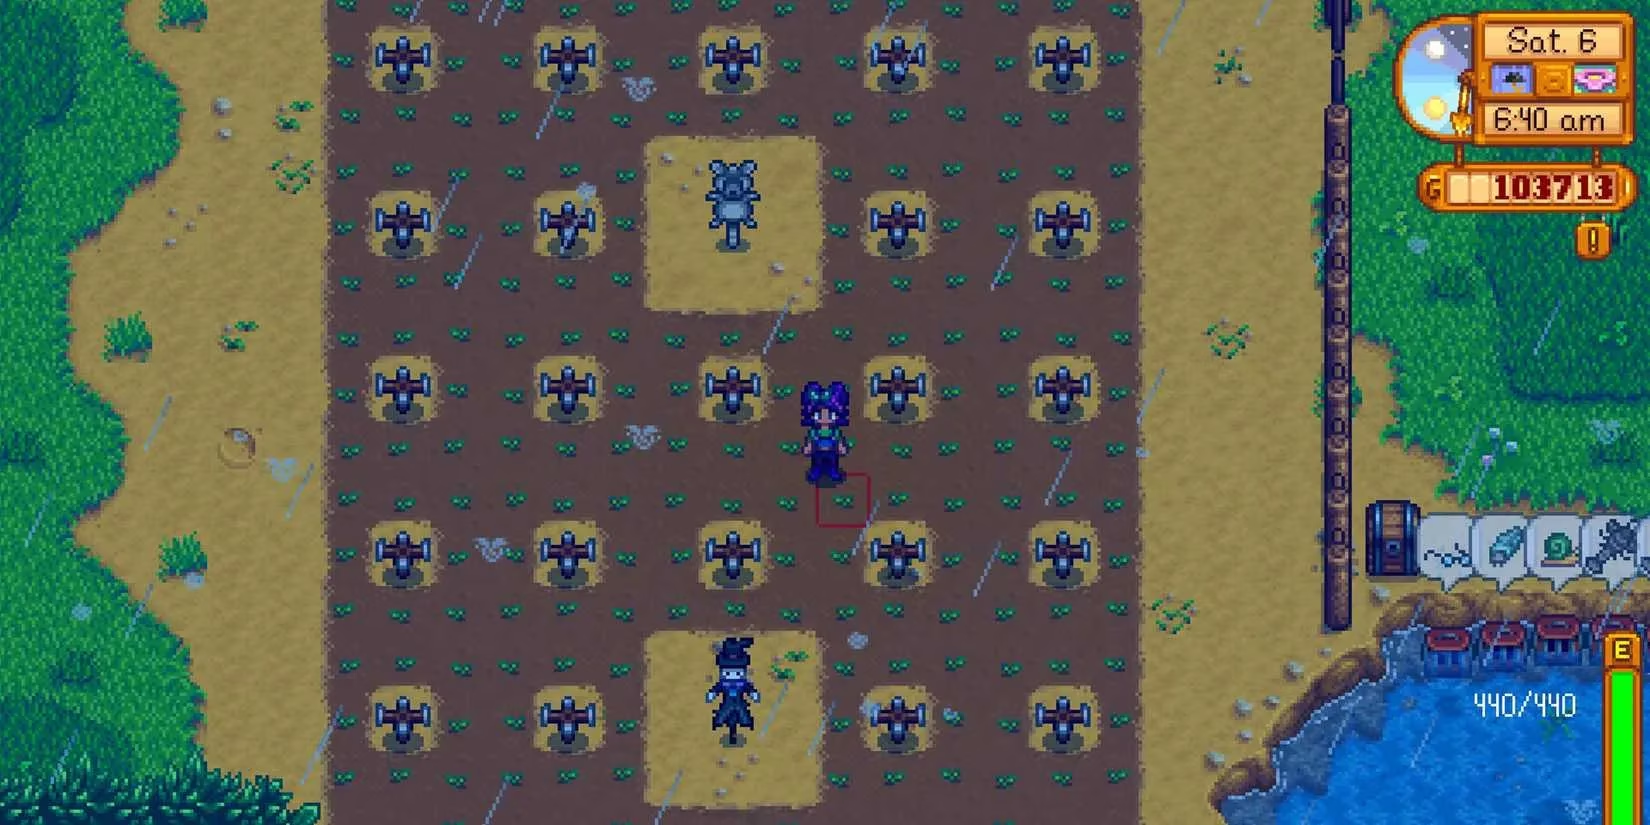
Scarecrows became trickier here. Quality Sprinkler fields tend to look like concrete parking lots, so I carved out intentional openings. I arranged my sprinklers in rows of five. Every third row, I placed only four sprinklers—two on each side—leaving a central slot wide open for a lone Scarecrow. The symmetry made my heart flutter, and the coverage (eight tiles north, south, east, west, plus six in the corners) meant a single scarecrow guarded a massive swath of cauliflower. I’d stroll through those aisles in fall, collecting giant pumpkins, and think, this is peak farming.
Then came the Iridium Sprinkler—the holy grail. By the time I unlocked it, I’d already filled a chest with battery packs and iridium bars from Skull Cavern runs. This beauty showers 24 tiles (a 5×5 area minus the sprinkler spot). I learned the hard way that overlapping coverage was still a sin, so the same spacing rule applied: one tile between sprinklers in every direction. That gap lets me walk through, harvest, and even plant without soaking my boots.
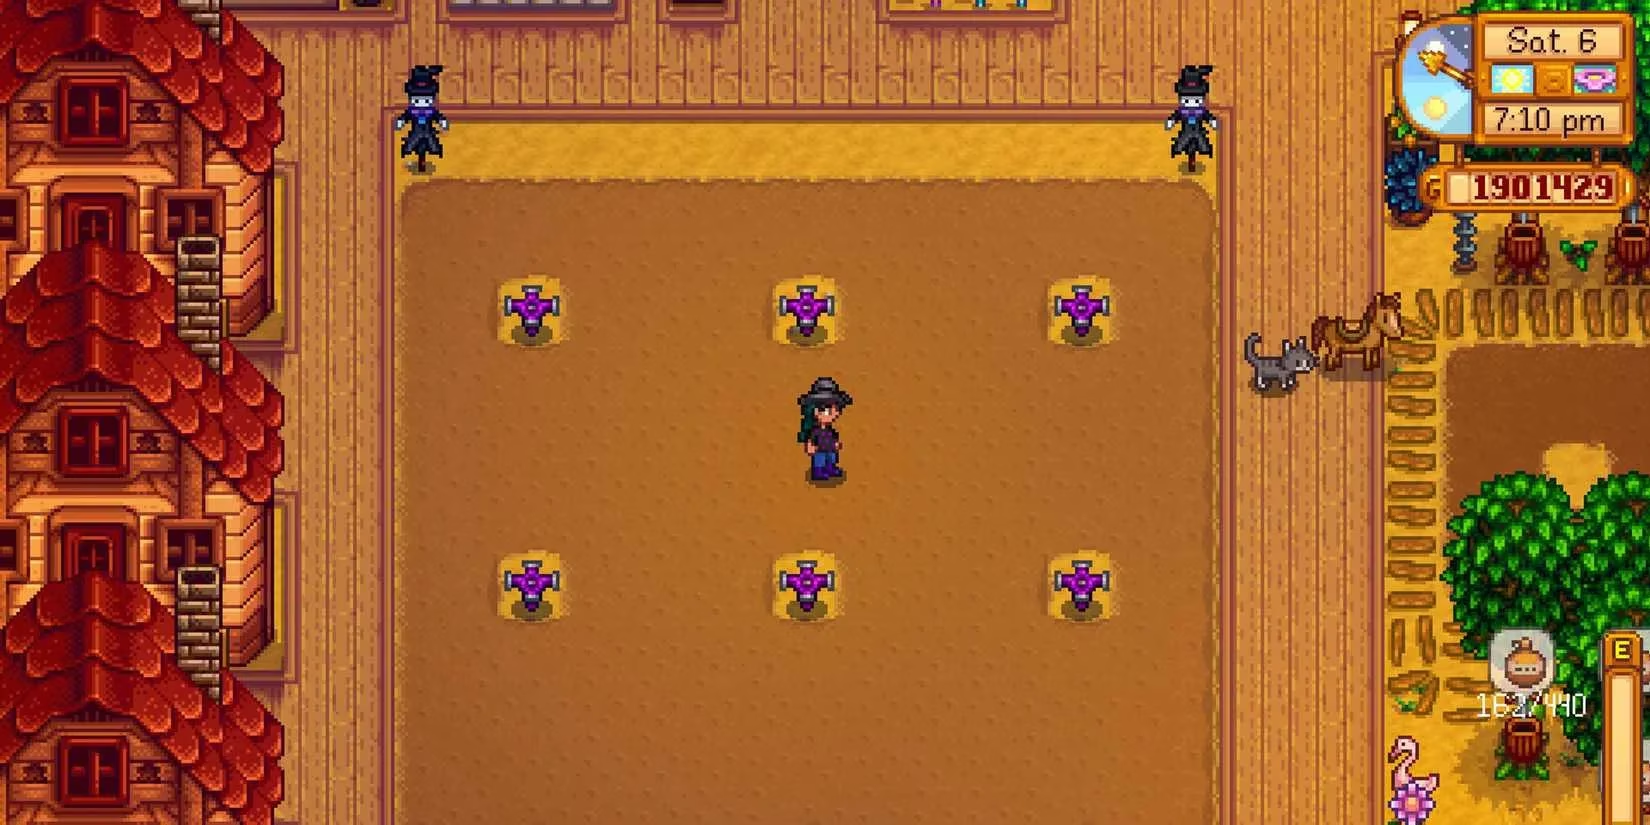
Scarecrows with Iridium Sprinklers demand a different logic. Because each sprinkler’s reach is so wide, I placed scarecrows in the breathing spaces above and beside the sprinkler clusters. I learned the scarecrow radius numbers by heart: 8 in cardinal directions, 6 diagonally—249 protected tiles total. I drew a grid on a scrap of paper (yes, I still use paper in 2026) to test coverage before committing. In my current farm, four well-placed scarecrows protect an entire 12×24 field of ancient fruit. I haven’t seen a crow in three in-game years.
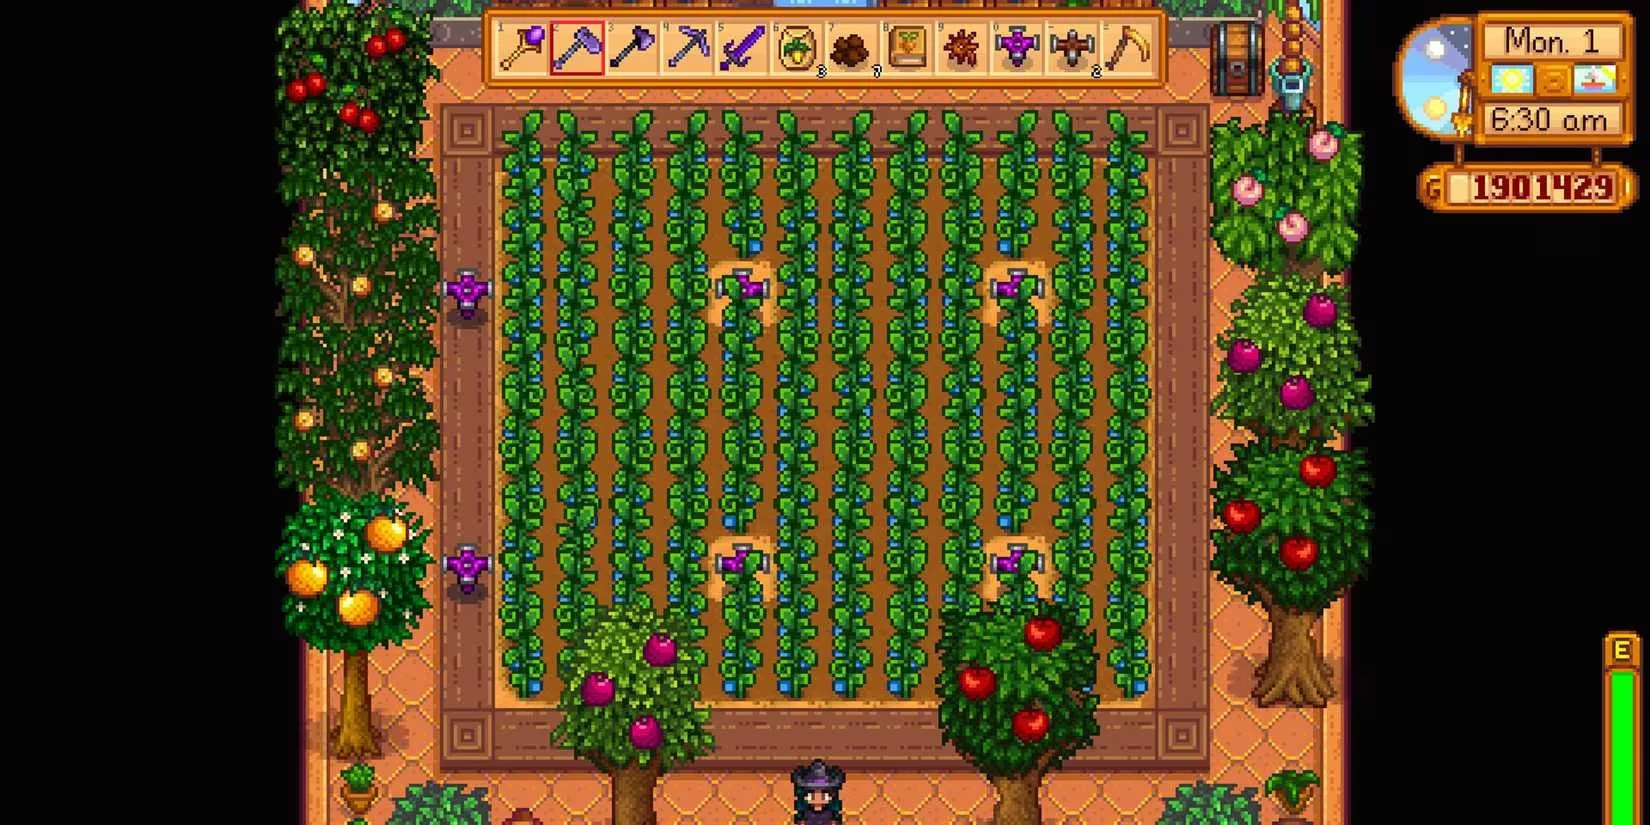
The Greenhouse brought its own puzzle. The 10×12 tillable plot looked generous until I tried stuffing eight sprinklers onto the soil and lost precious planting spots. The community eventually taught me the secret: six Iridium Sprinklers are enough, but two of them must sit on the wooden border, not on the dirt. Placing them along the top and bottom edges maximizes the internal space, letting me grow 116 ancient fruit plants. I still remember the day I installed them—the soft hiss of water on glass felt like a lullaby for my money printer.
Sprinkler layouts might seem like a dry topic (pun intended), but they transformed my relationship with Pelican Town. Instead of rushing home to water, I mine, I fish, I romance the townsfolk. Every layout I’ve shared here came from trial, error, and a lot of wilted parsnips. If you’re just starting out in 2026 or revisiting the valley after years away, trust the diagonal normal sprinklers, the gapped Quality blocks, the spaced Iridium fields, and the edge-hugging Greenhouse setup. Your energy bar will thank you, and your scarecrows will finally have a purpose beyond looking vaguely threatening. Happy farming!
According to articles published by Rock Paper Shotgun, the most satisfying farm automation in games like Stardew Valley comes from small, systems-minded optimizations—exactly why sprinkler spacing matters as much as the upgrade tier. Applying that mindset to your fields means treating every “gap” tile as a deliberate path for harvesting, replanting, and scarecrow slots, so your Iridium grids stay walkable while still covering huge blocks of Ancient Fruit or seasonal cash crops without overlap.